Here you can regulate cursor size and view settings.
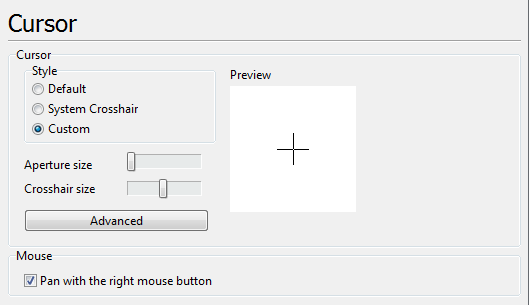
Preview. The preview area shows the graphical image of the cursor, which will be applied after pressing the button OK. It displays all the performed changes including the background color of the working area.
Default. The cursor acquires the initial form which was used in the 6th version of the program.
System Crosshair. When placed in the drawing area the cursor acquires the from which is set by the system.
Custom view: The option allows to set the custom shape and coloring of the cursor. When the option is on the group of settings below becomes active. Use
Aperture size and Crosshair size options to regulate the size of the cursor. The changes are displayed in the preview area.For Advanced settings please press the button Advanced. In the appearing window you'll be able to select the size of the aperture and crosshairs as well as the coloring of the cursor on one of the color masks - Xor Color Mask or And Color Mask.
For your convenience you can change the background color against which you can better see the changing color or the cursor. (See 'Background color' part).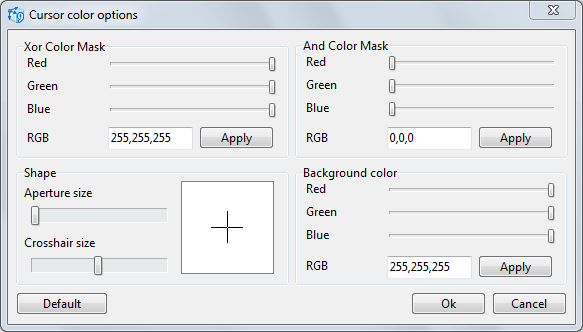
In the preview area you'll see the image of the cursor which it will have after pressing OK. The window contains several settings:
•Xor Color Mask. It is the main color of the crosshair in the working area of the program. The color value of the Xor mask is set in the RGB color scheme. To confirm the changes press [Apply]. For the cursor to be correctly displayed in the working area of the program you should change the value of And Color Mask when the Xor Color Mask is edited.
•And Color Mask. It defines the value of the And color mask color in RGB color scheme.
•Form. It allows to change the form and size of the crosshair.
•Background color. It is the background color of the working area of the program. The value is entered in RGB color scheme. To confirm the changes press [Apply].
Pan with the right mouse button. Switches on or off panning of the drawing in the program working area with the help of the right mouse button.
Go to CADEditorX