File printing is an essential task for those who work with drawings. ABViewer has two different printing tools: Print preview using the settings from the plot settings and Multipage Printing printing settings of which are based in the overall dimensions of the drawing. The required tool is selected depending on the file format (*.pdf, *.dwg, *.bmp etc.) and the way the file is prepared for printing.
•Batch Print (print of a group of files at different output devices)
It is convenient to use the Print Preview tool to print files that have the notion of a layout, e.g. to print DWG, DXF or PDF files. Usually drawings in DWG and DXF files are prepared for printing on the additional layouts which printing options are set beforehand. However, drawings can be designed in the Model area. Let's have a look at how to prepare drawings for printing on additional layouts with the help of the settings of the Plot settings dialog box:
1.All the required drawings are drawn to full scale (1:1) or any other in the Model layout.
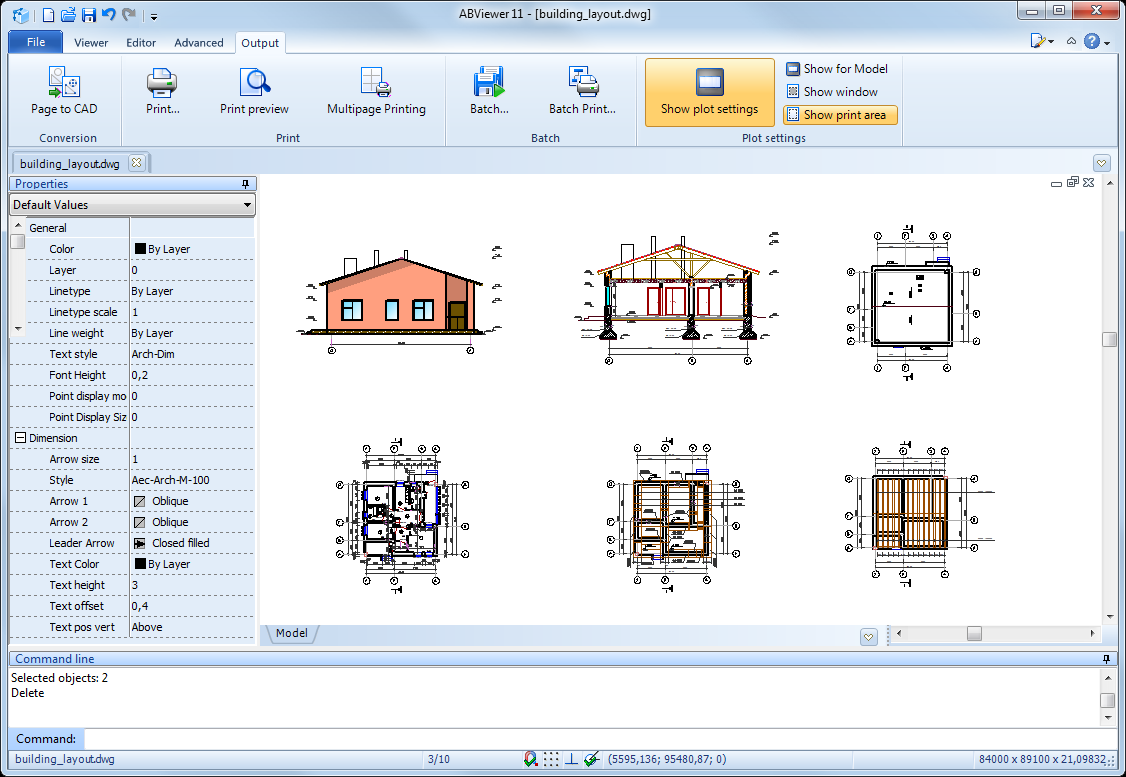
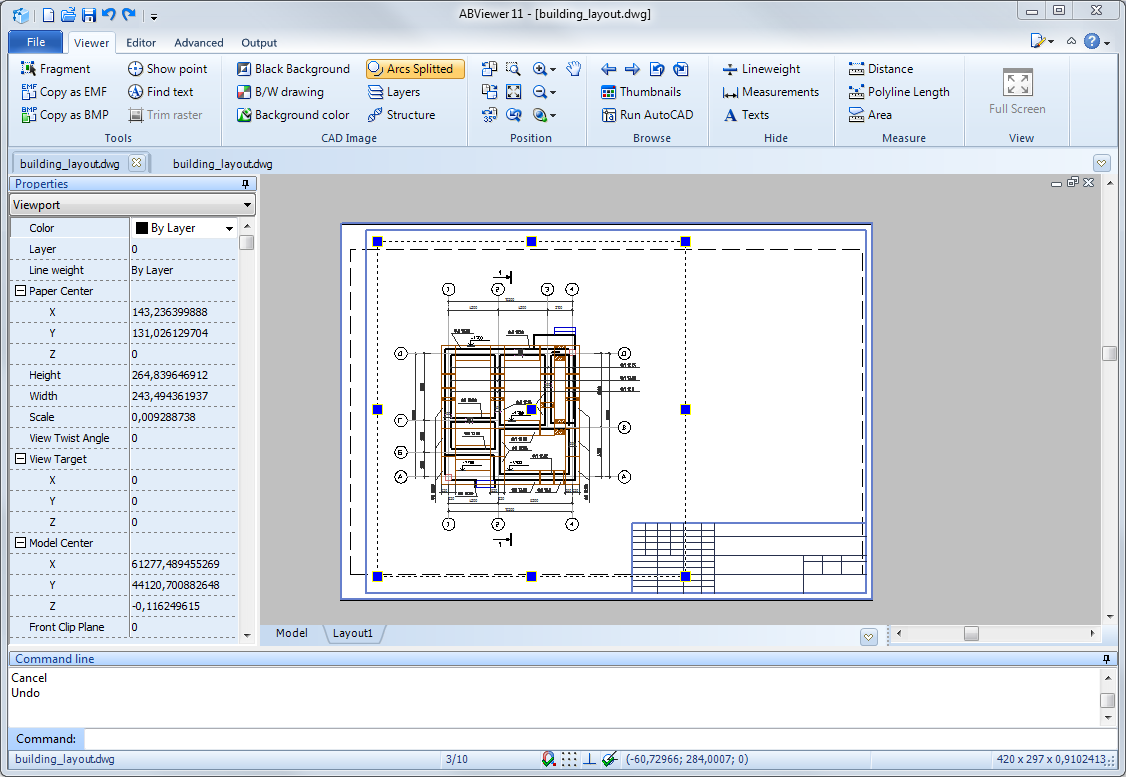
2.Create a new layout. When a layout is created a viewport displaying all the elements from the Model area is added to it by default.
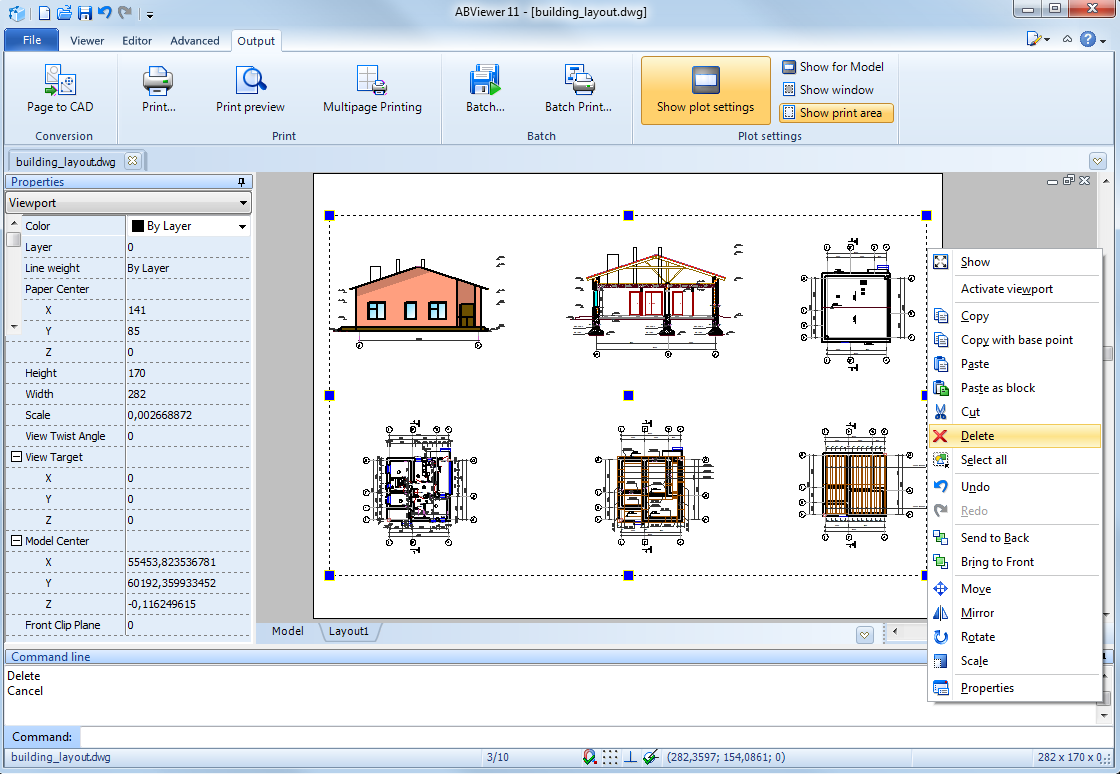
3.Select the viewport with the left mouse button on its border and delete it. After it a white empty layout will be displayed in the program window.
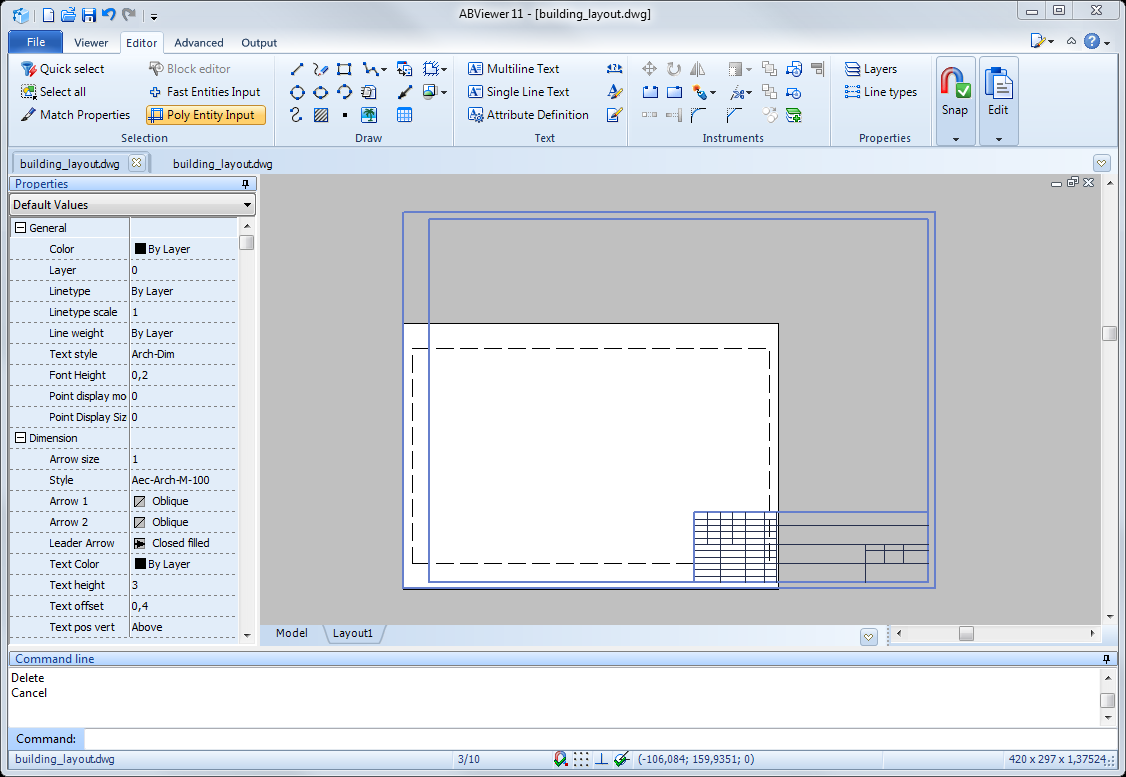
4.Then the border and title block are drawn. The next image shows adding an A3 border. It is clear that the border is larger than the white area that corresponds to the sizes of a layout selected for printing.
5.The Edit plot settings command is selected in the context menu of the additional layout.
6.Printing settings of the current layout are configured in the opened dialog box.
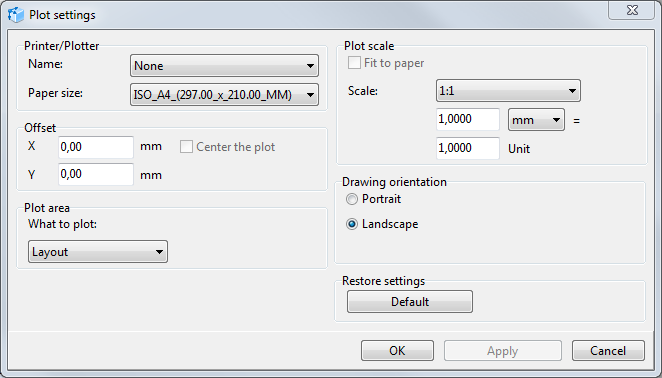
Due to the fact that in this example the drawing is prepared to be printed on the A3 paper, you should select the A3 paper size in the Printer/Plotter section.
The Plot area and Plot scale settings are also highly important. Please note that only the part of the drawing that is located in the white layout will be printed. The parts of the drawing located outside its borders in the grey background will not be printed out. That is why it is important to set the drawing printing scale to the selected paper format properly.
After it a viewport showing the required drawing from the Model area is added. If you don't want the viewport borders to be printed, you should place it in the switched-off layer.
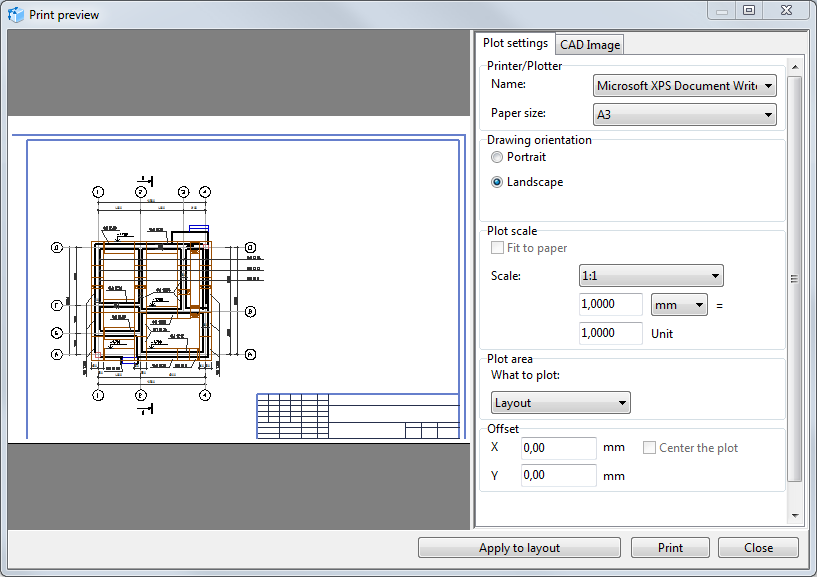
7.When the plot settings are configured select the Print preview command on the Output tab. In the opened Print preview window select the output device. Other parameters are set according to the plot settings that have been configured earlier. The following image shows that when the printer was selected the image a little bit shifted to the bottom. It has happened due to the fact that sizes of the not printed area of the None printer and Microsoft XPS Document Writer printer are different.
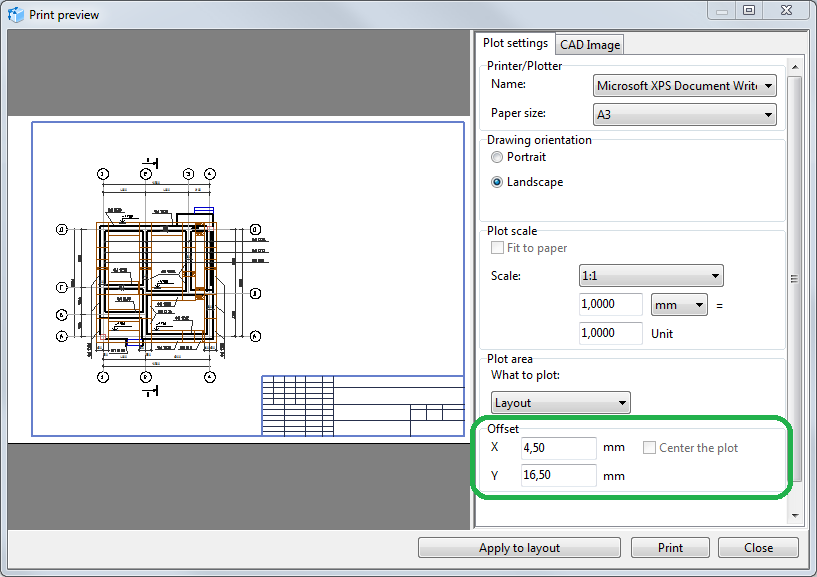
8.To solve this problem in the Print preview window on the Plot settings tab specify the X- and Y-direction offset.
ABViewer allows printing drawings on several sheets that can be joined in a single large sheet later. This feature is especially useful when it is necessary to print out large format drawing but you have just a standard A4 printer.
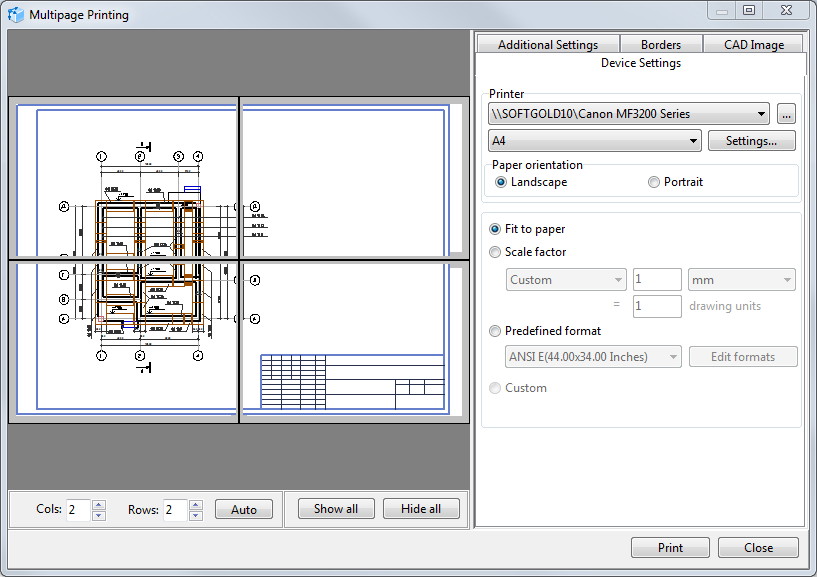
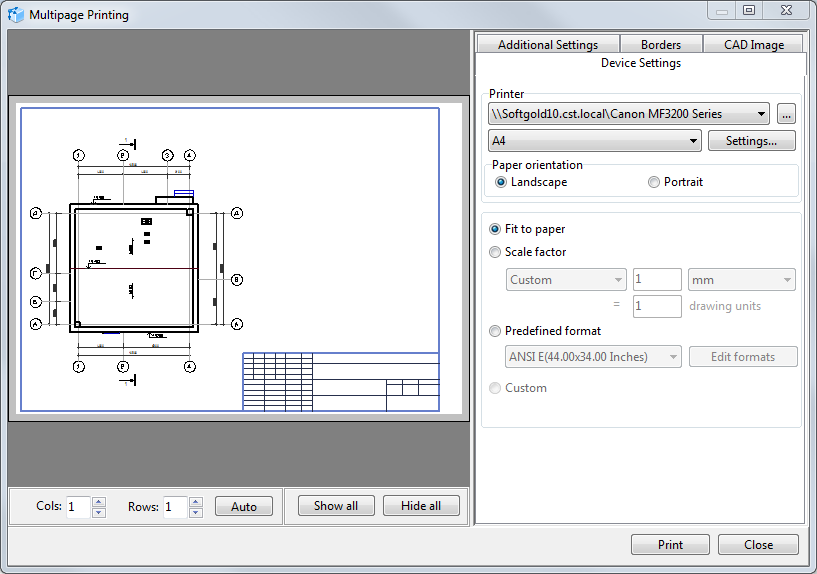
The Multipage Printing tool is used to print the drawing on several sheets. Tiled printing allows printing the drawing on any number of sheets of different formats with a required scale. For example large drawings (A0, A1 and others) can be divided into a number of small sheets that will be joined into a single large sheet later. Each tile can be printed out separately. Thus, if one of the sheets is damaged (for example, because of some problems with the printer), you can reprint this very sheet later.
Very often people design all their drawings in the Model area and don't use additional layouts. As a result they don't know how to print out one particular drawing from the Model area. ABViewer offers two ways allowing our users to print a required area of the drawing:
Method 1
You can select a rectangular area in the drawing for printing with the help of the Fragment tool. After it select the Multipage Printing command and configure the printing settings (printer, format, paper orientation, drawing scale etc.) in the opened dialog box. This way of printing allows the user to print the selected drawing area both on one or several sheets with a specified scale:
Method 2
When you print in Print Preview the printing area is specified in the Print Preview dialog box. By default everything contained in the drawing is printed out. To select only a part of the drawing you can use the Window mode.
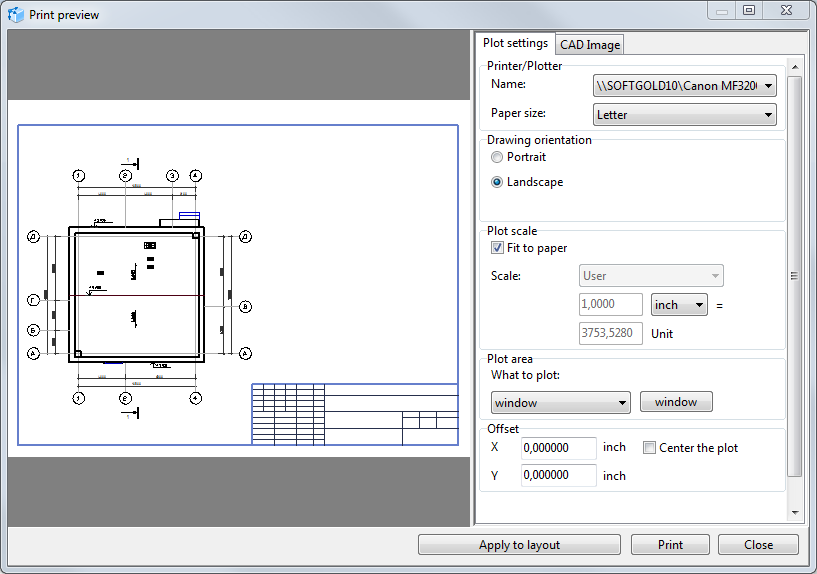
In the Print preview mode the part of the drawing is always printed out on a single sheet of the specified format. That is why if the drawing size is larger than the specified paper format, the drawing will be printed only partially. When you configure printing settings, to set the drawing scale correctly you should also take into account the scale of the drawing border.
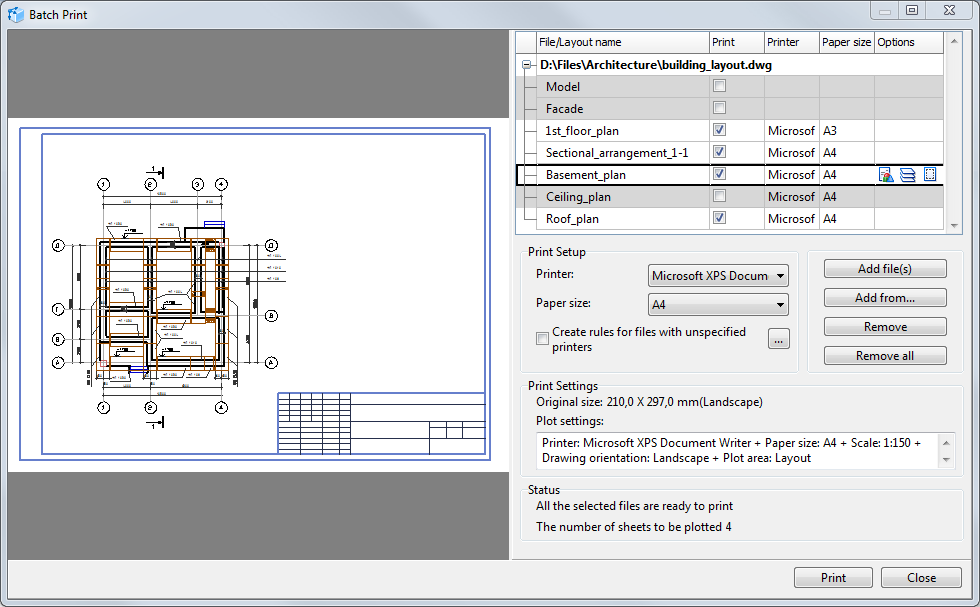
The Batch Print command allows printing out a large number of files while it is possible to select particular layouts to be printed.The output device paper format and other printing settings can be configured for each layout. This feature allows printing drawings with the help of different output devices. For example A1 layouts can be printed at a plotter while A4 layouts can be printed out at a standard A4 printer. To set identical printing settings for all A3 layouts printing rules are used. Printing rules also allow sorting files by their format.
Go to ABViewer